Since this is primarily a restaurant review blog, I figured I should do a post on eating Carnivore and out at restaurants. This is an interesting problem as most places assume you want a little bit of meat with a huge platter of carbs and vegetables, and don’t forget dessert! And meat is usually the most expensive thing on the menu, so you can’t always just order 3 steaks unless you are filthy rich.
The first step is to try to choose wisely. If you have a voice in the choice of restaurant, try to pick places that are going to have more carnivore friendly options, such as the obvious: the steak restaurant. Unfortunately these tend to be pretty spendy, so not everyone is going to be able to afford it. Here in Japan another handy option is the Yakiniku restaurant, where you can order meat and cook it yourself. There are pitfalls however, including price, and toppings. Learn how to ask for “niku dake” (meat only) or “tare nashi” (no sauce). There are some cheaper chains with lunch specials, but these are also problematic as they usually come with rice, salad and soup, and just a tiny bit of meat. Usually menus are good about showing the grams of meat that come with each option. I was able to find the maximum amount of meat for the price easily enough and just ordered 3 of those, with no rice or salad (I’m fine with soup), and it turned out fine. But the first time I got 3 rice bowls, 3 salads and 3 soups, so your mileage may vary.
If you can’t find a meat dedicated restaurant, always check the sides menu. Often times there are meat items on that list that you can order several of to at least get you through to your next meal.
Surprisingly, a great option for carnivores is fast food hamburger joints. Although most items on the menu are terrible and filled with chemicals, the meat is usually not that bad, and there is usually a giant hamburger/cheeseburger on the menu somewhere. Sometimes they'll even let you order it without the other ingredients, but if not, don't be afraid to throw those disgusting buns away!
And then there’s always compromise. It’s not the end of the world if you have a few veg with your meat, so maybe that cashew chicken dish won’t be too bad. If you basically have to eat the carb, always remember you can fall back on the rule of half! You don’t have to eat it all and half is better than all of it. It’s just a good rule of thumb.
Sunday, May 10, 2020
Eggses
Labels:
S:1 Carnivore/Sous-Vide
Eggs are another important tool in our Carnivore kit. The hardcore carnivores will say you should only eat meat, but I'm sorry, sometimes you need some other options. And I still believe eggs have got to be super good for you...they just taste too good!
I don't really have a lot to say about eggs, except that we eat them...often in the morning for breakfast. I love over easy eggs, but sadly they are best when mixed with rice, so these days I usually scramble my eggs, very messily, along with whatever fats I have lying around, such as butter, left over bacon grease, or sometimes heavy cream. I often will eat 3-4 eggs like this for breakfast and that keeps me until lunch rolls around, where I'll usually split a pound of ground meat with my wife, and repeat that for dinner.
I don't really have a lot to say about eggs, except that we eat them...often in the morning for breakfast. I love over easy eggs, but sadly they are best when mixed with rice, so these days I usually scramble my eggs, very messily, along with whatever fats I have lying around, such as butter, left over bacon grease, or sometimes heavy cream. I often will eat 3-4 eggs like this for breakfast and that keeps me until lunch rolls around, where I'll usually split a pound of ground meat with my wife, and repeat that for dinner.
Baking Bacon
Labels:
S:1 Carnivore/Sous-Vide

This is silly fun, but I have to share this technique of cooking bacon that we routinely use.
Ingredients:
Bacon
Instructions:
1) Line a cooking tray that has elevated sides (at least an inch) with aluminum foil.
2) Lay out the bacon one strip at a time in whichever direction maximizes the number of strips you can place
3) Pre-heat the oven to 200C/400F, place tray in the oven for 20 minutes when ready
4) Remove tray, transfer strips to a paper towel lined container
5) Eat the bacon...or put it in the fridge for later
6) Carefully shape the end of the aluminum foil in the pan to form a spout, then gently pick up the foil from the sides and back to pour any grease into a container.
7) Use the grease to sear or mix with scrambled eggs to get more fat in your diet
I don’t know why, but since we discovered this method we eat a lot more bacon. It comes out so delicious and evenly cooked, and we get the added bonus of more bacon fat to use in other meals. Unfortunately, most bacon is packed with chemicals and sugar, so shop around if you can to find one that is sugar and nitrate/nitrite free.
One Main Recipe: Sous-Vide Ground Meat with Cheese
Labels:
S:1 Carnivore/Sous-Vide

Ground meat is my staple food. And this is how I cook it so I don’t grow to loathe it.
I’m going to cut to the chase with the basic steps cuz I hate scrolling when I look at recipes:
Ingredients:
1 lbs ground meat 80% or less lean (i.e. 70% would be even better)
Salt/pepper/any other spices you desire
Slices of cheese (less processed the better)
Instructions:
Preheat Sous-Vide to your preferred doneness:
Lowest recommended temp: 131 F
(The higher the temp, the less moisture in the end)
1) Invert the top of the ziploc bag to prep it for inserting meat without touching the lock mechanism
2) If your ground meat is not already shaped to easily go into the ziploc bag, shape it now
3) Sprinkle salt/pepper/spices as desired
4) Insert the ground meat into the ziploc bag
5) Optional: Seal the bag and freeze for later
6) Use the water displacement method to submerge the bag and squeeze the air out.
7) Seal the bag and clip to the side, ensuring the meat is completely submerged. Tip: Hang a weight off the clip to keep the bag under the water if it floats
8) Cook for 2 hours minimum if thawed. If frozen, cook for 4 hours minimum. Note: If you are pressed for time, you can take it out a little bit early, cut it in half and sear the in and outsides of both halves.
9) Remove from the sous vide and bag. Use paper towels to dry off the meat as much as possible.
10) Heat a cast iron pan as hot as it will go, then sear the meat on one side (15-30 seconds).
11) Optionally sear the smaller sides of the meat (tongs are helpful)
12) Place the remaining large side down to sear, place one or two slices of cheese on top and cover with a lid. Sear for another 15-30 seconds or until the cheese has melted on top
13) Remove from the pan and enjoy!
I can’t remember how I found it, but on Amazon there’s a self-published book called the Frugal Carnivore by K. Suzanne. I was beginning to wonder if it was possible to continue to eat Carnivore without breaking the bank. Of course I was having tons of fun buying various cuts of meat and experimenting with Sous-Vide and other methods of cooking. But at some point, you have to settle down and live by a budget! Luckily this book showed be the way: Ground Beef.
Using ground beef in other recipes is fine, I’ve done it my entire life. But I don’t really love fried up ground beef just by itself. She suggested an approach which involved smashing two half pound paddies in a pan for a good sear, then baking them the rest of the way, throwing cheese on if you’re a dirty, dirty Carnivore (like me!). This sounded pretty good to me, but I have to confess I haven’t actually tried it yet. Instead, I googled how to Sous-Vide ground meat, and came across several articles talking about sous-viding hamburger paddies. None of them seemed very interested in larger hunks (for obvious reasons), but suddenly it clicked for me! My local grocery store sells 80% lean ground meat in 1 lbs blocks. According to the Frugal Carnivore lady, I should eat one pound in the morning and one pound in the evening. I was pretty sure I could sous-vide that pound, then sear it, and throw some cheese on top for flavor. That would be pretty easy! And cheap and easy is the name of this game.
So bought some of these 1 lbs blocks and started experimenting. First I tried vacuum sealing them, despite the warnings online that over-pressed ground meat wasn’t that great texture-wise. Sure enough, not the best experience. Then I tried the ziploc quart bag approach. Cooked at 135 F (I was still a bit nervous to go as low as I could theoretically go and still be safe: 131 F), for 2 hours to be safe. Took it out, seared it, popped cheese on top with a lid for the last little bit to melt it. And wow...mind blown! It’s definitely way redder than you would ever normally eat ground beef, but it’s been cooked at a safe temp for long enough to make it safe to eat. It’s the rarest ground beef you’ve probably ever tried and the texture has to be tried to be believed. Additionally, because the temp is so low, the fat doesn’t render out into grease for the majority of the mixture, meaning you get all that great fat mixed in, but you don’t really even notice it. Even my wife (who can’t stand fat by itself) has zero issues with sous-vide ground meat. She’s even more enthusiastic about than I am sometimes! I do wish I could get 70% lean meat, but I have not been able to find any source where I live.
We’ve experimented with various spices and flavorings, and honestly we’ve ended up just coming back to salt and pepper as our favorite. I did try going without the cheese for a while and I just gotta have it. We use Tillamook medium cheddar. The amazing thing is that we really don’t get tired of it! Sure every now and then we want something different, but usually we are looking forward to returning to our usual ground beef immediately after. I have various other meats stocked in the freezer for when we need a break, but every week we are still on the ground meat.
One thing that concerns us is that our ground meat source is the commissary on Yokosuka Naval Base. It’s about $2 a pound, and these days we’re eating around 3 lbs per day between us, so about $90 a month. We can put special orders in to have them make larger quantities packaged more conveniently (4 pounds to the package). All of this is terribly convenient...but non-existent elsewhere in Japan. The closest we have found is Costco, where we can pick up larger quantities of ground meat. Unfortunately, it’s a huge hunk of meat, which I’d have to separate into smaller amounts before bagging it. They do have pre-formed “paddies” (more like pucks) but these are all 90% lean. Perhaps there are more options in the freezer section. We’ve been going to all the local Japanese grocery chains and local butchers to see if there’s any way to get ground meat like we are used to at anywhere near the price, and the answer is no...even Costco is going to be more expensive. So...while we have access to it, we are using the commissary, but someday we may have to find another source.
So there it is, our main staple meal as Carnivores.
About Gout
Labels:
S:1 Carnivore/Sous-Vide
The one hiccup I had in my first year of eating carnivore was my first (and only so far) experience with gout. It was about 4 months into my experiment, immediately after 30 days of eating only grass-fed beef striploins (which I now realize had less fat than I needed, but that's another story). I was sent to Bahrain for work, and in Bahrain there is plenty of delicious food. Of course, I was going to eat all that food, and I hit the ground running, eating all the carbs laid before me, whether rice, bread or potatoes. About one week into the trip and eating like this, I had two different meals consisting of beef and chicken livers in a row.
That night I felt a pain in my left big toe that woke me up. By the time morning rolled around, I found I couldn't step on my left foot without excruciating pain. I had to call in sick to work and call around town during Ramadan to find a hospital. Limping my way through the hotel to the taxi, I went to the hospital and saw the doctor, who immediately diagnosed me with gout. They shot me up with some pain killer, gave me a dose of some kind of medicine, and more meds for later, and then sent me home saying to stay off the foot for 2 days (ugh more work missed).
I told the doctor about my all meat diet just prior and he said that made sense to him as my body had gotten used to high uric acid levels from the red meat that were steady. But then coming to Bahrain and immediately changing my diet, combined with those liver dishes (high uric acid contents), I gave my body a form of chemical whiplash that resulted in the depositing of some of those uric acid crystals in my toe joint, and thus the gout. I asked him if he thought I was in any danger of more gout if I returned to the all meat diet and he said he didn't think so, so long as I transitioned slowly from one diet to another.
So, that's what I've done since then. Having a "cheat" meal is usually no harm, but switching drastically from eating all meat to no meat for several days in a row, and then back again, is not a good idea. When I had my blood tested at the end of the full year, my doctor here in Japan commented on the high uric acid levels, but he didn't indicate it was any direct threat, just that I should be careful. And I am...I do still love liver, but I try to be judicious and not eat too much at any one time.
Sous-Vide: Equipment and Advice
Labels:
S:1 Carnivore/Sous-Vide
Sous Wha?
Sous-Vide is a cooking method that utilizes vacuum sealed bags to cook food in a temperature controlled water bath. It is particularly useful for cooking meat at low temperatures safely provided you cook it for long enough. This is great for Carnivore as eating meat as close to raw, and eating fat un-rendered, is highly desirable.
It used to be a super-expensive method of cooking food, due to the equipment involved, but several years ago a few small groups set out to crowd-fund various home-use Sous-Vide circulators, making Sous-Vide affordable to the masses. This is my attempt to distill my lessens learned over the past year or so into a single article.
Equipment
Sous-Vide
I will confine myself to commenting on models I have used. There are lots out there, and if you want to you can read great comparison reviews. Almost all of them will have the following models on their lists, but I have actually owned these:Anova Nano
My first Sous-Vide was the Anova Nano. It's a bluetooth only stick rated at 750 watts with a plastic body. I bought it for about $125, but it's now about $100 and you can sometimes get it for less. The best part about any Anova Sous-Vide is that they have manual controls on the top that you can use to set the temp and time with your actual fingers. Of course there's an app too, which you can use to connect in this case via bluetooth to do the same. But sometimes you just don't want to use the app, so it's nice to have the options right there. This is a fine intro Sous-Vide, though it can take a while to heat up the water at it's lower wattage, it keeps it at the temp, which is really the most important thing. Of course, if you want to be able to remotely turn it on or off, you are out of luck as there is no WiFi or cloud support for this model. I would also warn that it doesn't sit as low in containers as other models, so you have to put more water in to get it above the minimum line, forcing you to heat more water than you might want. Also, the screw clamp can sometimes crack plastic containers, especially if you hit the device at the wrong angle. I've had to throw away one plastic container already as a result. I still have this guy, he lives at work!
Anova Wifi + Bluetooth 900 W
My second Sous-Vide was the upgrade to the Nano, the Wifi edition with 900 watts of power. It's $200 now (discontinued model) but I picked it up for $172 on sale. The main reason I got it was because Anova advertised that it was possible to schedule the device to come on at a certain time, which would be ideal for ensuring the water was at the proper temperature in the morning when I wake up to pop some meat in so it would be done by the time I had to leave and go to work. Unfortunately, this was false advertising, and even though their technical support said the feature was "on the way" it never materialized (to this day I believe). That being said, it was a decent Sous-Vide in every other respect, having the manual controls like it's little brother, but adding the ability to turn it on/off from anywhere with Internet access. This was useful for getting the water hot while at work, ready to pop in some meat for dinner when I got home. However...the day came when I had to reset my phone due to an update that wouldn't fit on my phone’s drive. After doing so, I had to reset the wifi on my Anova as well. This turned into a multi-day-week process of failure, calling tech support, trying multiple things, until I finally gave up and bought something else. Remember, I work in IT, so I'm used to all the technical nonsense, but this was ridiculous. First of all, it only works on 2.4ghz networks, and is so finicky, those network SSIDs must use simple characters, and *SO MUST YOUR PASSWORD*! That is bonkers. It's also incredibly sensitive to changes in signal strength, etc... All this to say...nope...done. I bought my replacement and sold this one to a friend who said he had no issues getting it hooked up to his wifi. Good for him, but I'm never buying another Anova if I can help it. I will say it sat a bit lower in containers than the Nano, and the extra power definitely made a difference in heat times.
Joule
The Joule is $250 list price, but I got it at $205. It's a little guy, but packs a whopping 1100 watts of power. The biggest turn off I'd had previously was that there are almost zero manual controls. That's not quite true though...you can press down for a while on the top and it will turn off. Otherwise, you must use the accompanying app to turn it on and off. This would be a royal pain, except that they also have Echo/Alexa support via a skill, so you can say "Alexa, ask Joule to set the temperature to 131 degrees" and it'll just turn on. You can also ask for a status update or for it to stop. The primary feature I bought it for was the ability to turn it on and off from anywhere (see my review for the Anova Wifi above). As long as it did that and worked, that's all I really wanted. But I have been pleasantly surprised by it and it has become my favorite Sous-Vide I've owned thus far. Sadly, it doesn't support scheduled start times, though I don't see why it couldn't. Someone has created a Chrome add-on that let's you turn it on/off from you web browser when connected to the same network. What is really needed is for someone to make an IFTTT plugin, or to enable full "smart thing" Alexa support and then we'd be off to the races! Anyway, I'm not that kind of IT guy, so I just make do. Other perks I didn't realize at first: it has a magnetic bottom, so you can stick it in a metal (not aluminum) pot and it will just stand there! It has the lowest water level requirement of any sous-vide, so you can cook in very, very low levels of water if you want to. It's uses a unique bottom draw, top exit water flow system that seems to work very efficiently, though I'm sure the 1100 watts doesn't hurt either. It was able to heat up the same amount of water significantly faster than either of my previous Anovas. Also, it uses a clip with a gentle rubber pad to stay upright in a container, so no damage. I love this guy, and my only fear is that someday the people who maintain the app will stop supporting it and make it obsolete. Hopefully this Chrome add-on will keep working!
Containers
Next on the list are containers. You need to put your water and meat into something, preferably big enough to circulate well.Rubbermaid 12qt
I bought two of these early on and still have one. The other cracked due to the Anova Nano's tightening mechanism and I had to toss it. This is a good size, though a little big if you are just cooking for yourself every day. You can put several steaks or a large piece of meat in easily. It can get a bit crowded if you're cooking a large piece of meat over several days and then want to pop something small in. The biggest drawback to this container is it has no insulation. You can buy wrappers to insulate it better, but that's yet one more thing. Of course, there are also lids you can buy to prevent evaporation, and I bought one. Turns out I rarely use it because I often clip to the side of the container rendering the lid pretty useless. Another handy accessory to grab is a set of steel dividers if you cook a lot of steaks. I also found other uses for these as weights to keep food from rising. More on that later.
Lipavi 20qt and lid
As I hungered for more volume to cook larger hunks of meat, I obtained this container which is made more specifically for Sous-Vide, and the price was a bit higher. I only rarely use it these days but it is nice to have the ability to cook a very large hunk or a great many smaller steaks. Once I was in charge of sous-viding the steaks for a medium sized BBQ, so I did them all ahead of time, then ice-bathed them to bring them over for the finishing touches on the grill. Worked perfectly.
Coleman 5qt Cooler
In the opposite directly, since I'd been regularly cooking a single pound of ground beef in my larger 12qt container, I began to think it might be better to get a smaller, insulated container to save power and speed up heat times. These little 5qt guys are definitely tight, and I don't know that I could use them if I didn't have a Joule sous-vide, but they work great for just one pound of meat. Heat up in about 10-15 minutes too, so I don't have to remind myself to turn it on before the end of work, I just do it as I start walking home. This is my main setup at the moment. Cool thing is the lid is completely removable, so you don't need to bother with it. I actually bought two of these and had a friend drill a U cut in the middle for my Joule to fit, but haven't ended up using it because of the lack of space inside to ensure the bag stays submerged. I find the evaporation is quite slow and easy to keep up with. Having a second small cooler for ice baths is a nice thing too.
Coleman 16qt Cooler
Loving the insulation approach, I decided to replace my 12qt plastic container with this 16 qt cooler. I did a longer cook the other day with some larger cuts and decided to try it out. Works great! The lid is hinged, though I could rip it of if I wanted to. But I might want to use it as a proper cooler at times, so I will leave it on. The evaporation is more significant, so I may look for a solution to that at some point. I hear ping pong balls floating on the top work well...
Vacuum sealers and bags
FoodSaver FM2000First, I need to emphasize that it is not necessary to have a vacuum sealer in order to do Sous-Vide cooking. Personally I use mine far less than I thought I would, instead preferring ZipLoc bags for many applications. However, there are scenarios in which it is very nice to have a vacuum sealer, particularly for steaks I would say. And larger cuts of meat. I picked up this relatively cheap vacuum sealer along with the starter bags that come with it. Since then I’ve ordered more bags, but haven’t gone through the second batch nearly as quickly. There are two types of bags, pre-sealed except for one end, and rolls, which have 2 sides sealed, allowing you to cut them to fit the size you wish. Personally I find the pre-sealed type to be less useful. With the rolls, howerver, I have found it best to double seal at every opportunity, and be careful of putting anything bony in there! You don’t want to have a burst bag during your cook, it’s messy and then you have to clean everything. Also, if you get the cheaper sealers, they don’t handle moist or wet conditions well, sucking all that moisture right up to the top and spoiling your chances of getting a seal. Then you have to clean it all up, get a new bag, toss the old one, etc... It’s a pain. So I’ve learned a couple of things to help with that: 1) you don’t have to wait for the full vacuum before sealing...just press the seal button whenever you think it’s ready and it will stop the vacuum. If the meat is just a little moist, this works best. 2) Bag frozen when you can. There are some downsides here too, as the hard edges can sometimes puncture the bag (in which case, double bag), or getting the spices to adhere to the meat evenly (spread a light layer of olive oil over the meat before applying spices), but you can get a much better seal if the meat is already frozen, and it doesn’t take long to thaw meat in the Sous-Vide, especially for long cooks.
Ziploc Freezer Bags, quart and gallon
Ziploc bags are awesome! Cheap and easy to use, I use more quart bags than anything else. With Ziplocs, you use the water-displacement method when putting the bag in the water, letting the water squeeze out all the air before sealing the bag. Then clip it to the side and hang a weight off the clip onto the meat to keep it under if there are some bubbles (those metal spacers I mentioned above are perfect for this). A tip for putting meat into the bags (applies to the vacuum sealed variety as well) is to fold the top of the bag over on itself just a little bit so when you put the meat in the juices don’t get all over the lock mechanism. When I go for my big ground meat runs, I get up to 20 1 lbs hunks of meat and process them all at once, spicing them, bagging them, and then freezing immediately. From frozen, I’ll cook them about 3-4 hours (4 preferrably), or thawed about 2 hours. Sear it up in the cast iron pan and they are ready to go. This is my main staple food on Carnivore. The gallon size are useful to, especially for larger wet cooks, like marinated chicken. I’ve also used them as a double bag option when I have a suspect vacuum sealed bag, but this can lead to air pockets and floating problems, so I don’t do it too often.
Searing equipment
Cast Iron PanCheap, easy, highly recommended. However, grease splatter is a real problem. I haven’t solved this yet, but we have to do a deep clean every week or so to keep up with it. One suggestion is to not put any butter or grease in the pan when searing...it’s not the best sear, but it reduces splatter. Eventually the fat will render out anyway and you’ll be back to splatter.
Iwatani Torch
In a pinch, usually at work, I’ll use an Iwatani butane torch to sear my meat. Of course, you should always dry as much moisture off of your meat with paper towels before any kind of searing. The torch method is...just ok. It doesn’t give the same great flavor as a cast iron pan, that’s for sure.
BBQ
Sadly, I can’t have an open flame BBQ on my porch, and I don’t want to bother with a gas grill. But I’ve had steaks seared on a BBQ or smoker, and wow...really good stuff!
Others
There are lots of other pretty awesome searing options out there for those who can afford it or are allowed to use them. A google search will show several.
Miscellaneous
Pressure CookerWe have an Instant Pot 6qt and 8qt. I know, a bit overkill, but sometimes you just need to cook meat in different ways! I use ours primarily to cook beef tongue, because I tried to sous-vide it and I don’t recommend it. Also, we make bone broth, soup stock, or caramelized onion base for various things when we get the fancy.
Conclusion
Ok, that’s it for the equipment list. If I think of more I’ll add to this list. I’ll try to summarize a lot of this with a post dedicated to my staple meal: ground meat...mmmmboy!Journey to Carnivore: Baby Steps
Labels:
S:1 Carnivore/Sous-Vide
Don't call it a diet...
I begin this series with a recap of my journey to Carnivore/Zero Carb. I don't like to use the word "diet" in reference to Carnivore, as that implies fad, temporary dieting for the purpose of losing weight primarily. As will be evident, eating Carnivore isn't a diet in that sense for me, it is more in the dictionary sense of "diet": a description of the food I eat on a daily basis.
Pain!
This all began several years ago when I lived in Kuwait. I've always been able to eat just about anything with little to no negative reaction. I have no food allergies and rarely have food poisoning. I began to develop burping fits that would sometimes go on for days at a time. These would sometimes also be extremely painful, keeping me up at night and making me generally miserable. I tried antacids, identifying triggering foods, etc... Nothing seemed to work.
Sugar = Poison
Of course I was also concerned about my increasing weight, and at some point I realized sugar, carbs, and processed foods were probably the source of most of my trouble in that area. Over the course of about a year, I cut out all sugar (to the best of my ability). What helped most was to re-orient my concept of sugar. I started substituting the word "poison" for sugar in every context I could, especially in my mind. This helped a surprising amount, because you are much less likely to ingest poison without thinking twice about it. Eventually, as sugar was eliminated and I lost my craving for it, I found myself feeling healthier.
Carbs = Sugar = Poison
Along these lines, I also began to cut carbs. Many years ago my wife and I had tried an Atkins-style diet and neither of us liked it. Me especially, as I loved rice too much to give it up. But now I understood better that carbs are basically just a raw form of sugar as far as our bodies are concerned. So I started thinking of carbs as sugar, and sugar as poison, therefore helping me cut down. I didn't go all the way at first. I spent about a year living by the "rule of half": at every meal, if there is a high carb component, just eat half of it. This took some getting used to and practice, but over time it became easier. I wasn't necessarily trying for weight-loss, but this year resulted in the most notable weight-loss I had ever experienced. And I felt so much healthier over all. I will add that I finally realized I had to give up beer (or at least move into the category of a treat). The carb-laden beverage was starting to have a clear and smelly affect on my digestive tract. I have since learned to appreciate Scotch so much more!
Processed foods = <unpronounceable ingredients> + Sugar = Poison
The third plank in that year of change was to finally recognize that processed foods are just plain terrible. They are packed full of unpronounceable chemicals, artificially engineered to increase addictive responses to keep us coming back, and usually full of disguised sugars. I began to eliminate all processed foods wherever possible, trying to consume as much minimally processed food as possible.
The Fast Tract Diet
However, I still wasn't experiencing complete relief from the burping/acid-reflux/GERD symptoms. I read somewhere that a low-carb diet often alleviated these, so I decided to give it a try. To my astonishment, I immediately got worse! This was so frustrating, so I did some searches about GERD getting worse on low-carb diets and came across an article at https://digestivehealthinstitute.org/ discussing why that might be the case. This guy's "Fast Tract" diet approach made a lot of sense! Certain foods tend to ferment in the stomach resulting in bacterial colonization of the stomach by the upper digestive system, resulting in tons of burping. Finally, an explanation that made more sense to me, along with an intriguing approach to managing things: each food is assign a Fermentation Potential (FP) value that is based on sciency things (read the site if you're interested). Basically, you pick a maximum FP value per day, and select foods with low FP that add up to less than that value throughout the day. Presto...burping and acid reflux managed! However...I wasn't thrilled with his acceptance of highly processed foods such as white bread vs brown bread as being "better" eating. This was because it was easier to digest...but basically just turned into sugar. In any case, I tried it for several months and then got the gist of how to follow it without using an app or tracking anything. The idea is still sound I believe, but I was ready to try some more extreme options. I still recommend it to fellow GERD sufferers.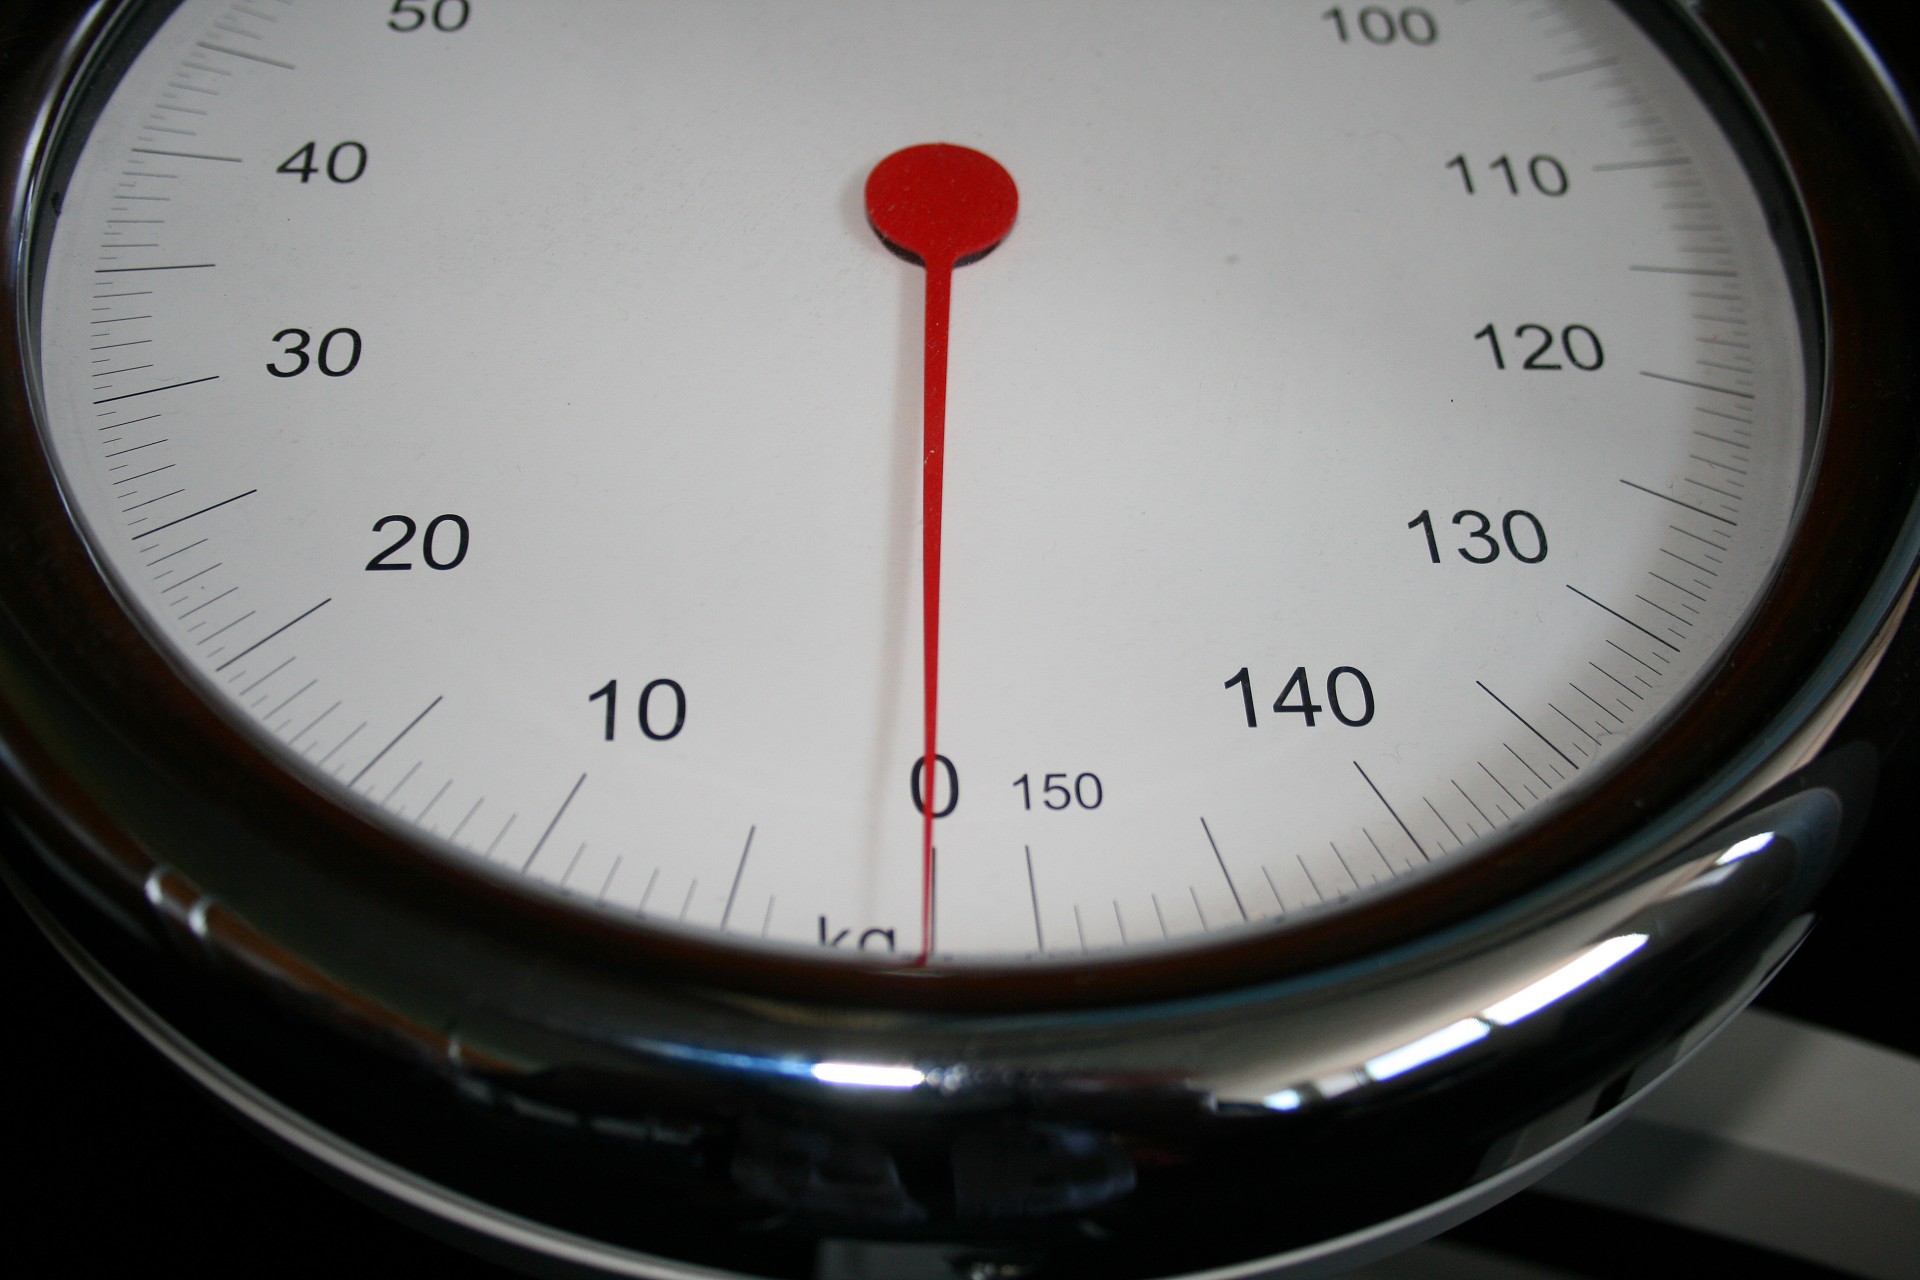
So close I can taste it...
The weight-loss had been encouraging, but I really wanted to get down closer to an "ideal" weight. Not that I buy the BMI approach to "ideal" weight, nor do I believe there is any such thing really, but I just wanted to feel what it was like to get down to what most people would consider "normal". For me, that would be somewhere in the 150 lbs range. I had been as high as 220 lbs in Kuwait. Having gotten down to around 190 lbs over those couple of years, I was ready to see if I could get even further down. This was about when I started hearing about Keto.
Keto explosion!
Of course, Keto is all the rage now, but at the time it was a brand new idea to me. It clicked when I finally realized it was just switching the brain over from primarily running on glucose (i.e. sugar) to ketones (i.e. fat). This is done by drastically limiting carbs and increasing protein and fats. There are lots of different Keto diet approaches out there, but as I was starting out I found a "30 days" plan and decided to try it. One week in I exploded with burping...some of the most painful I'd had in a really long time. Of course, it was because the main way the diet got low carb but high volume was by using a lot of spinach, an extremely high FP food for me. I have to say I also found Keto to be a bit too fiddly to stay on long term. I needed something that was more of a permanent lifestyle change than just a short-term "diet".
Going the whole carnivore
Disappointed and frustrated, I did some more research online and came across Zero Carb or Carnivore. At first this seemed a bridge too far, but then I found the raw meat folks, so no....there is even more crazy out there! Carnivore is simple: eat meat, preferably high fat content, until you are full. That's basically it. There are variations, some people are purists (only grass-fed beef!), others "dirty carnivores" (cheese and milk ok), some mix in intermittent fasting (6-8 hour eating window), but essentially, it's to just eat meat, as much as you want. I had been reading around the edges of this thing for a while, but was more on the Keto bandwagon until I actually tried it and exploded. Since I was in the middle of this Keto experiment, I just decided to go whole-hog (pun intended) and cut all the veg out. My painful burping cleared up almost immediately. Since I was already in ketosis, I had very little issues transitioning to full Carnivore.
1 year later
I spent the next year experimenting with Carnivore. I did the full 30 days, only grass-fed beef test (no real difference I found). I discovered Sous-Vide (the other topic of this series) had direct benefits to eating Carnivore. I had an unfortunate experience with gout when I traveled to Bahrain for work and went off Carnivore (don't change your diet too quickly!), I got my blood work done at the beginning and end of the year to see if there was any negative effect on my overall health (none, numbers were all great, and the doctor was pleased with my BMI...woohoo), and I came across a great resource for how to eat Carnivore on a budget. I also experimented with intermittent fasting. All of this over last year (2019), and at the end of it, I am still basically eating Carnivore (dirty, dirty Carnivore, I like cheese way too much to stop eating it) and have had no ill effects (gout not withstanding, but more on that later).
So how much did I lose?
One thing that didn't happen? I didn't reach my "ideal" weight goal of 150 lbs. Oh well...I currently hover between 165-170 lbs (depending on whether I've had a carb-laden cheater meal), but it has been rock solid for a very long time. It's like my body just decided..."this is how much I want to weigh, and there's nothing you can do about it!" But you know what? I feel great! I almost never have issues with painful burping (except when I go off Carnivore of course), and the difference between how I feel when I eat Carnivore vs carbs is night and day (fuzzy headed, bloated on carbs).
All this with no exercise...
BTW, did I mention I basically don't exercise at all? I'm in IT and sit at a desk all day. My only exercise is to walk to and from work about 15 minutes one way, 4 times a day.Here to stay
So I've settled into this thing and it's pretty much here to stay. Maybe it's terrible in the long run, but so far so good, and as long as I'm still feeling good and my doctor is happy, I'm going to keep it up.
Advice
This is my main piece of advice that I took away from all of this:Go slow - Don't try to jump to the hardest thing. Identify a small, achievable goal and work on that until it becomes habit. For example, if you're all excited by the idea of Carnivore, but you still basically eat a terrible diet now, don't quit and try Carnivore now. The goal is not to temporarily alter your diet...you want to permanently alter it. But if you try too much too soon, you're more likely to fail and quit. My suggested steps are 1) cut the sugar, 2) cut the carbs (half is fine, you'll still see benefits), 3) try Keto as a half-way house (it helps get your body used to ketosis for sure), and then 4) go for Carnivore. And if you're a fellow sufferer from GERD symptoms, give the Fast Tract Diet a try.

And now for something completely different...
The next post will be about Sous-Vide cooking, a method of cooking that uses vacuum sealed bags in temperature controlled water. I honestly don't know if I'd still be eating Carnivore had I not concurrently discovered this wonderful method of cooking meat. But it's been a long road of figuring things out, so I'll endeavor to distill all I've learned into a single post.Special Series Introduction: Carnivore/Sous-Vide
Labels:
S:1 Carnivore/Sous-Vide

Greetings! I don't know if anyone other than myself actually reads this blog, but I've decided to do a special series of posts on the topics of Carnivore (aka Zerocarb) and Sous Vide cooking. For the past couple of years, if you've paid attention to trends on this blog, you may have noticed my meals tend to consist of low to zero carbs. As a result of my change in diet, my enthusiasm for reviewing restaurants has diminished somewhat, as my options for eating out have been restricted. In addition, I have reviewed so many restaurants in my immediate vicinity that it now takes more effort to find something new, let alone interesting or good! Thus the blog has languished with my haphazard updates.
Additionally, I frequently find myself having to explain to friends or family all about my journey towards eating Carnivore, answering questions about how that really works, whether I experience any side effects, how I don't get bored of eating meat, and how do I manage to keep the grocery bill manageable. Add to that my recent obsession with Sous-Vide and those explanations.
So the other day I thought to myself in the shower (where else?) that maybe I should do a new blog or series of posts all about these topics, so that if someone was genuinely interested they could learn from my experience.
And here we are. This is the introductory post...future posts are forthcoming, but here's my current plan:
Journey to Carnivore: Baby Steps
Sous-Vide: Equipment and Advice
One Main Recipe: Sous-Vide Ground Meat with Cheese
Baking Bacon
Carnivore and Eating Out
I may add more over time as inspiration strikes.
Enjoy!
Subscribe to:
Posts (Atom)